Mirrored photography (if you google it) refers to any image where a reflection is involved - either actual or imposed. In a small subset of these you will see examples where an image has been duplicated and the copy flipped on the horizontal or vertical to line-up with the original and so created a faux reflection.
The joy of mirrored photography lies in revealing surprising shapes, e.g. an oval created by a bridge arch reflected in a stream. "Look for reflections" is one of the many pieces of bite-sized advice offered to photographers in any work dealing with composition. It is a very old, and satisfying approach.
With the ease of digital processing the faux-reflection has enjoyed some popularity, and can therefore be quite a tired effect. Certainly it's instantly recognisable and so the end result has to be very strong to work.
So my approach here is to capitalise on the ability of reflected imagery to reveal new shapes - pushing this to an extreme so that at first sight the image is highly illustrative, rather than photographic, in feel. But I want to stay true to the photographic starting point, so the image is at first a geometric illustration which transforms on closer inspection to a more photographic feel.
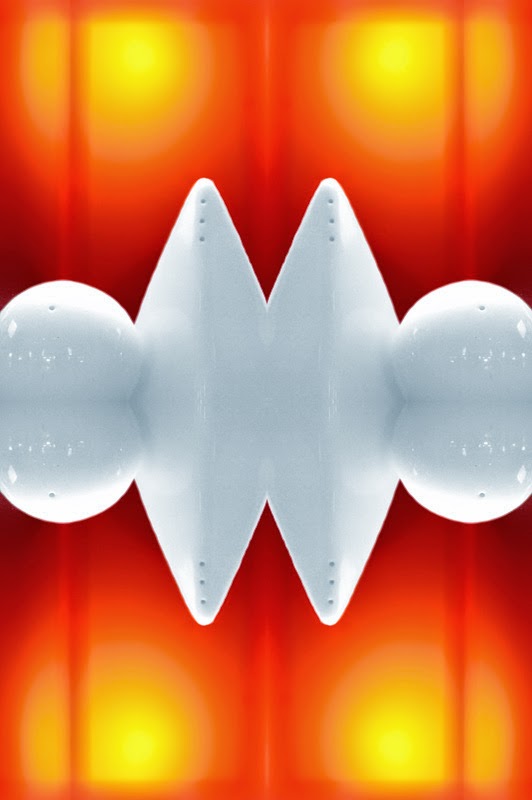
The technique is deceptively simple but surprisingly flexible. A base image can be copied (and flipped) once to create a new image - if the starting point is already highly geometric this can be enough, as in these examples:


By arranging strong diagonals stretching across the frame it is straightforward to compose 4x reflections:


 These images are from the same shot of the ceiling of the cafe in the V&A Museum. This illustrates the effect of deciding to place the near point or the far point at the centre of the tilling, to provide a convex or else concave (tunnel) feeling.
 This shot of the roof at Paddington not only had a long receding diagonal, but also a branching diagonal that teed-off too one edge. On tilling the image this branching diagonal creates an extra strong graphic element - the near oval that has been highlighted in yellow. Similar effects are apparent in the earlier examples also and it is these minor, opposing, diagonals that help to create the graphic effects that are so appealing in the tilling technique.
But more complex shapes can give rise to more interesting reflected arrangements, as with these shots of curved rail tracks. Note in the second example an asymmetrical crop has been applied. I wanted to emphasise the face-like effect, so by cropping asymmetrically on the vertical I have avoided repeating the 'mouth' shape at the bottom of the image.


Almost any inorganic structure can be bent to the approach.


But possibly surprisingly, highly organic starting points also work well. These examples show a wide-field view of tree tops (looking up) and a small-field close-up of grasses.


Some final 4x reflection examples:


2x and 4x reflections can clearly generate a wide range of illustrations from just about any source subject. But sometimes the resulting illustration can take on an even more striking geometry by further tilling the result (it is not necessary to flip as the images already have a symmetry).


Some summary observations:
- Look to bring strong elements (arcs, diagonals) to the very edge of the frame
- Take care in cropping arcs so that smooth circles or ellipses result when tilling
- Avoid making the result too much like an illustration by including strong photographic elements (people, signs etc.)
- Near-field to centre tilling creates convex effects
- Far-field to centre tilling creates concave (tunnel) effects
- Look out for, and use, minor opposing diagonals to help create new shapes
- Consider an asymmetrical crop of the result to gently disturb the repetition
- Tilling can impose order where none existed
- When a subject won’t offer a pleasing compositional balance, tilling can provide that
- The illustrative nature of the images means that stronger than usual saturation can work well
- A 4x reflection can be further tiled without the need to flip since the tile now has perfect symmetry.
- The centre-centric composition of a reflection-tile can be overcome by creating an odd number of tile repetitions.
- A larger number of repetitions can further enhance the pattern that a 4x tile creates
Congrats for the absolutely amazing photos, gorgeous all the way around! I am Port Macquarie Photographer and It's a real pleasure for me to see your work and hope we get to work together some time in the future!
ReplyDeleteMany thanks!
DeleteSo great to see amazing post within this blog. Appreciation for posting and sharing them.I am Mishkat from Clipping Path Lab
ReplyDeleteExcellent photos. I am so glad to be here. Thanks
ReplyDeleteGreat article. This tips are very helpful.
ReplyDeleteJust peculiar your mirror photography. Nice to see you...clipping path service usa
ReplyDeleteReally amazing article, Thanks
ReplyDeletePhoto restoration service || Clipping Path service ||Image masking
Ghost Mannequin Services || Car image editing || Image Retouching || Color correction || Background removal || image editing service
perde modelleri
ReplyDeletesms onay
mobil ödeme bozdurma
NFT NASİL ALİNİR
ANKARA EVDEN EVE NAKLİYAT
trafik sigortası
DEDEKTOR
web sitesi kurma
aşk kitapları
smm panel
ReplyDeleteSmm Panel
İŞ İLANLARI BLOG
instagram takipçi satın al
hirdavatciburada.com
beyazesyateknikservisi.com.tr
SERVİS
Tiktok Jeton Hilesi
Good text Write good content success. Thank you
ReplyDeletepoker siteleri
bonus veren siteler
tipobet
betmatik
betpark
mobil ödeme bahis
slot siteleri
kralbet
güngören
ReplyDeletemanavgat
marmaris
nevşehir
rize
EZH1Z2
salt likit
ReplyDeletesalt likit
N7EUNK
This blog offers a fascinating dive into the art of mirrored photography and tessellation. The breakdown of how simple reflections can transform into complex geometric patterns is captivating. I love the detailed examples that demonstrate the creativity behind these compositions. It’s inspiring to rethink reflections and symmetry in photography!
ReplyDeleteشركة كشف تسربات المياه بالاحساء 6pwc3TV39p
ReplyDeleteThis was such a refreshing and informative read. Bravo!
ReplyDeleteVisit Here: jewelry retouching service
شركة عزل اسطح بجدة
ReplyDeleteBRieJRLCQ4
شركة عزل اسطح بالقطيف
ReplyDeleteIQzKXUERfc
شركة تسليك مجاري بالجبيل
ReplyDeleteRHuzp