In his original book (Images a la sauvette), Henri Cartier-Bresson (HCB) referenced
Cardinal de Retz's statement that "There is nothing in this world that does not have a decisive moment". To my mind there is no photograph of worth that does not capture a decisive moment. It is this that gives a still image narrative, and which transforms an image from being a document to being a work of art: for such a moment cannot be captured by instrumentation alone. It requires attention, thought and possibly 'intuition' on the part of the photographer. By demonstrating the impossibility (or extreme unlikelihood) of capturing that moment by instrumentation I intend to add to the argument for photography as art.
HCB himself defined the 'decisive moment' as:
"...the simultaneous recognition, in a fraction of a second, of the significance of an event as well as the precise organization of forms which gives that event its proper expression."
Here he is emphasising the instantaneous coalescence of the event, or if you will, the intuition of the observer. 'Intuition' is a disturbing term. It conjures concepts of divine intervention, something beyond the consciousness of the practitioner. Well, he came from a time and society that still hung on to mystique and mysticism (he suffered a strong catholic schooling). However, if we can accept intuition as the expression of the subconscious mind then we can still find some value in his idea. The crucial thing is to separate the instantaneous moment of capture from the moment of recognition - our hand need not be guided by god at the moment of taking a photograph (or by the mechanics of a camera's software algorithms). The decisive moment can in fact be foreseen.
So, for me, the decisive moment is nothing more nor less than the precise time at which a composition's narrative intent is best portrayed.
Reading around the subject on internet forums will dredge up the usual cacophony of dogma. There's a lot of argument about being in the right place at the right time and having an element of surprise. Arguments that imbue the process with mysticism, that rob us of the right to break down the process and formulate working practices to improve the chance of success. It is not a matter of luck, or the genius of those with great 'intuition'. It is a matter of understanding, recognition, and preparedness. In photography we make our own good luck.
There are also schools of thought that make the decisive moment a genre, a classification of photography. There are arguments about whether a picture is a 'decisive moment picture' or not. This seems simply futile. All photographs of worth contain within them the four perceivable dimensions of our world: the horizontal and vertical as clearly expressed in the flat image; the depth as represented by the depth of field, the plane of focus and the camera-to-subject geometric effect; and the timing as decided by the instant of exposure. All photographs freeze a moment in time. If that specific moment adequately expresses a narrative then the image is an artistic endeavour. If it does not then the image is either a snapshot or else a documentary record. In the first case the image contains a decisive moment. In the latter it does not.
A good test for a photograph's successful capture of a decisive moment is to ask "why was the image taken at just that time?" If there is a reasonably apparent answer then the image likely contains a sense of narrative.
So what does the decisive moment look like in practice? Here are some examples progressing from longer lasting, to shorter lasting moments:
Examples of the Decisive Moment
Example 1: Moments That Last - Cocoon
This cocoon hung from a garden chair for several days with little discernible difference. However, this image has a strong sense of time about it. It clearly represents the cycle of life. It was taken during a particular summer when this variety visited our garden. It was shot at a particular time of day, when the lighting suited. The dogmatists will squeal in uproar that I dare to use the term 'decisive moment' for an image such as this, but I'll do it and be damned because I know that many time based factors coalesced at the moment I took this shot.
Example 2: Moments That Drift - Cranes
Perhaps using a less controversial application of the term 'decisive moment', this particular arrangement of the clouds between the cranes lasted a few minutes. This reveals an important aspect of decisive moments. They can be foretold, anticipated. The "spontaneous recognition" can occur a good thirty minutes or more before the moment arrives and is captured.
Example 3: Moments That Pass - Trafalgar Square
In some genres of photography, anticipation seems difficult, particularly anything that encompasses human activity: sports, stage, street... But in fact these activities generally take place within a well-defined boundary (the race track, the stage area, the visible street). By observing action repeatedly within that boundary you quickly come to learn the rhythms of the action, and acquire an ability to anticipate - to select and watch the moment arrive.
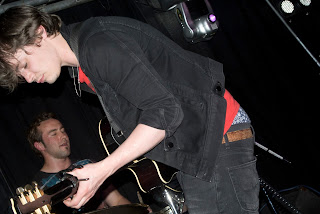
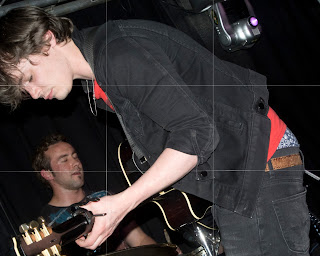
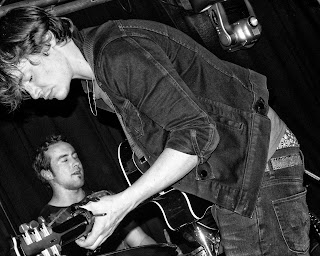
Example 4: Moments That Flee - Dan Hunt
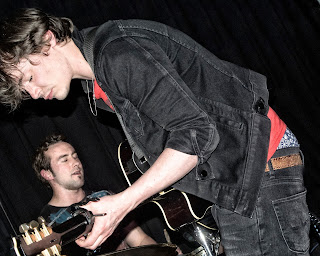
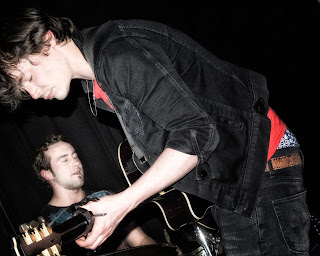
In some regards stage photography is easier than street as the boundary is so much tighter and the mic stand can focus or constrain the performers. But this example of the decisive moment is less about transverse motion and more about attitude and expression. To capture a moment like this it's necessary to observe the subject in order to build up an anticipation of the moment to shoot. At an open mic night performers typically play three pieces each. I will watch the first piece to build up understanding and then shoot during the second and possibly third piece. Because the expression and eye contact is critical to the success of the shot, the duration of the decisive moment is very short - of the order of a second with regards the stance and the hand gesture.
Example 5: Moments That Blink - Woody Bop Muddy
There's so much waiting to go wrong with this shot. Wait too long and the rice loses its forward trajectory collapsing into an incoherent curtain of rice rain. Shoot too soon and you don’t get the spread and the arm obscures the face. Here, the decisive moment is no more than a fraction of a second.
Duration Of The Decisive Moment
With regards to capturing them within a two dimensional bounded frame (a picture of finite size), decisive moments have a finite duration.
When dealing with things that move longitudinally or latitudinally (or both) through the frame, the duration of the moment is correlated to the size of the moving object (in relation to the frame size) and its speed, within some placement tolerance.
Decisive Moment Duration = Extension * Tolerance / Velocity
When the moment moves towards the photographer (orthogonal to the plane of the frame) it will have an apparent zero velocity but will exhibit a delta in extension (a change in size). The duration of the decisive moment is correlated to the tolerance we have on that change in size.
Decisive Moment Duration = Delta Extension / Orthogonal Velocity
When the moment doesn't move in relation to the frame (e.g. is an expression on a stationary person's face) then the duration of the moment is arbitrary, depending on the nature of the subject.
Decisive Moment Duration = Indeterminate
So, apart from the latter (special) case, the duration of a decisive moment is a factor of the size of the thing moving in relation to the speed of its movement, in the frame - within some acceptable tolerance.
Returning to our earlier examples I will look in more detail at the duration of the moments. In these examples where movement is involved I segment the image so a sense of distance can be determined. I also highlight the acceptable area for placement of the key compositional items.
Example 1:
The decisive moment is not determined by the subject but rather the ambient conditions, and here I assume they are tolerably indifferent over about 15 minutes. The window for this decisive moment is
900s.
Example 2:
The central mass of the cloud which fills approximately 2/15th of the frame and moves across the whole frame in about 900s (I didn't time it however). The frame has been split into 15 strips. It takes about a minute for the cloud to cross each. The cloud could not have been placed any earlier (as it would have fouled the first crane), but could have been placed two strips later. So from the cloud's perspective the window for this decisive moment is
60s.
The pigeon (strip 9) is at full wingspan (0.6m) and travelling at perhaps 20kmph (or 5.5m/s, it was a leisurely old bird. Racing pigeons fly on average at 92.5kmph).
The pigeon fills about half of a strip. So each strip at the pigeon's distance from camera will be 1.2m and the distance across frame will be 18m (15*1.2). The pigeon would cross the frame in 3.3s (18m divided by 5.5m/s), crossing each segment in about 0.2s. Compositionally we have 2 segments leeway in the positioning of the pigeon. So from the pigeon's perspective the window for this decisive moment is
0.6s.
Example 3:
The foreground figure fills approximately 1/7th of the frame's width (body only).
The man was walking briskly, about 4mph or 1.8m/s. Average stride for a man is about 1m and we can see his stride covers 1.5 segments. To move completely across the frame, he has to cover 7 segments. So for his distance from the camera he has to take 5 x 1m strides at 1.8m/s, which is 2.8s to completely cross the frame.
Each strip is 2/3rds of a meter and takes 0.37s to cross (2/3rds divided by 1.8m/s). The man is placed in the centre of the third strip. I could have placed him anywhere from the very start to the very end of the third strip, so I had one strip of tolerance in my composition - but, because the woman at the back is also moving I cannot afford to exercise that tolerance. So that makes the decisive moment the time to cross that one strip. The window for this decisive moment is
0.4s.
Example 4:
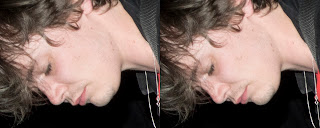
I said earlier the duration would be around 1s with regards the stance and hand-gesture. Here though the expression is crucial and that is related to the words being spoken. Average speaking rate is around 100wpm to 250wpm for an auctioneer. I know this poet recites quickly and so words are probably changing every 0.3 seconds or so (180wpm), with the expression constantly shifting with them, as is the nature of expressive performance. The window for this decisive moment is 0.3s.
Example 5:
To freeze thrown rice, a shutter speed of about 1/250s is required. Here I used a shutter speed of 1/15th of a second to achieve the blur effect I wanted. At this shutter speed we can see the hand covers two (of the 8) vertical segments that I've split the frame into. The tolerance for the placement of the hand was another two segments (one above and one below its position). The window for this decisive moment is
0.13s.
I am also interested in the spread of the rice. I've indicated the allowable range where the cluster will not foul either of the people in the shot. To my eye the cluster as shot is perfect, covering about 36% of the frame area. The cluster could reasonably have been smaller, covering 16% of the frame (as shown by the inner shaded area). The un-shaded area therefore represents the duration of the decisive moment with regards the rice, 1 (vertical) segment. The window for this decisive moment is
0.07s.
The following table expresses the earlier examples in these terms. Note, for 'action' images the decisive moment duration
is given by Size * Tol * Velocity:
Example
|
Motion Type
|
Size
% of frame
|
Tol.
|
Velocity
seconds to cross frame
|
Decisive Moment Duration
|
1 - Cocoon
|
None
|
90%
|
n/a
|
0s
|
900s
|
2 - Cranes, cloud only
|
Longitudinal
|
10%
|
2
|
300s
|
60s
|
2 - Cranes, with pigeon
|
Longitudinal
|
3%
|
6
|
3.3s
|
0.6s
|
3 - Trafalgar Square
|
Longitudinal
|
14%
|
1
|
2.8s
|
0.4s
|
4 - Dan Hunt
|
None
|
25%
|
n/a
|
0s
|
0.3s
|
5 - Woody Bop Muddy, hand
|
Latitudinal
|
25%
|
2
|
0.25s
|
0.13s
|
5 - Woody Bop Muddy, rice
|
Orthogonal
|
36%
|
1
|
0.2s
|
0.07s
|
So in these examples, with the exception of stationary or slow moving subjects that do not have fleeting changes of expression, the decisive moment has a duration in the range of around 0.4 to 0.1s. With an average human reaction time when concentrating of around 0.15s, the effective decisive moment duration is somewhere between 0 and 0.2 seconds. Let us say that:
on average the decisive moment has a duration of 0.1s.
Of course there are many forms of subject I have not considered, most especially high-speed action, such as: a kingfisher in flight (20mph); an F1 car (average speed around 100mph); the world's fastest recorded tennis serve (163mph). In these situations the photographer will generally pan which has the effect of prolonging the decisive moment.
Mechanics of Capturing The Decisive Moment
The main reason that I'm discussing the duration of the decisive moment is to consider how best to capture it. Options for triggering the camera's shutter release are:
- Manually, once with anticipation of the moment
- Manually with a burst of several high speed shots around the moment
- Automatically by employing some form of external sensor trigger
- Automatically on a time lapse
The latter two methods have their place in specialist applications (shooting night creatures as they pass a laser trigger or creating time lapse videos for example) and fall outside the scope of this essay. They may or may not be effective at capturing the decisive moment and whether they do or not is largely a question of fortune after the photographer has pre-set the conditions.
For less specialised applications the photographer has to choose to manually trip the shutter and can apply one of the two manual options in the hope of doing so at just the right moment (within the 1/10th of a second that the moment lasts on average).
So, can firing a burst of shots at a high rate of frames-per-second (fps) capture the decisive moment?
Nikon's D300 delivers 6fps. At a shutter speed of 1/30th of a second the probability of capturing the moment is 1 in 3. To demonstrate this, consider the following diagram:
The circles show the one second timeframe split into thirty intervals of 1/30th of a second each. The points when the shutter is open are shown in yellow. The interval between shots is shown in blue. This diagram shows four possible points when the 1/10th of a second (=3/30ths of a second) decisive moment may happen:
- Point A (in red) will be a missed shot as it falls in the interval when the shutter is closed.
- Point B (in amber) will probably be an unacceptable shot since the decisive moment is forming whilst a shot is being taken.
- Point C (also in amber) will probably be an unacceptable shot since the decisive moment finishes in the same interval that the shutter fires, and so has passed too far.
- Point D (in green) will be a good shot since the decisive moment has become established before the shutter opens and remains stable until after the shutter closes.
The chance of capturing a good shot of a moment using a burst of exposures is given by the following formula (many thanks to
Holly Hayes for help in deriving this):
Given:
De - Duration of event
Ts - shutter speed
Ns - number of shots taken
fps - frames per second
Probability of capturing good shot is
(De - Ts)*(Ns-1) / ( (Ns/fps) - De )
For the D300 example, this gives:
De = 0.1s
Ts = 0.033s
Ns = 6
fps = 6
(0.1 - 0.033) * (6-1) / ( (6/6) - 0. 1 ) = 0.37
Which is just about 1 in 3.
The formula assumes that we will start shooting before the moment happens, which in all likelihood we will: therefore the first shot is bad and we subtract one from the number of shots.
Notice that as the shutter speed decreases the chance of getting the shot increases. This is because a shorter shutter speed is less likely to fall at the start/end of the moment; e.g. for a shutter speed of 1/120th of a second (0.008s):
(0.1 - 0.008) * (6-1) / ( (6/6) - 0. 1 ) = 0.51
Also notice that the number of shots taken has little effect on the probability of capturing the moment, since number of shots appears on the top and the bottom of the division; e.g. if we shoot twice as many:
(0.1 - 0.033) * (12-1) / ( (12/6) - 0. 1 ) = 0.39
The frame rate has a significant effect. Consider if we invested the £5,000 or so needed to upgrade from a D300 to a D4 so that we could shoot at 10fps, keeping all other parameters the same:
(0.1 - 0.033) * (6-1) / ( (6/10) - 0. 1 ) = 0.67
Here the probability of getting a good shot is 2 out of 3, as opposed to 1 out of 3 with the D300.
Pushing the equation to the limit, shooting 10 shot at 1/8000s (0.000125s):
At 6fps: (0.1 - 0.000125) * (10-1) / ( (10/6) - 0. 1 ) = 0.574
At 10fps: (0.1 - 0.000125) * (10-1) / ( (10/10) - 0. 1 ) = 0.999
It is clear that a higher frame rate is highly desirable.
Charting shutter speed against probability for 6fps and 10fps gives:

In conclusion
can firing a burst of shots at a high rate of frames-per-second (fps) capture the decisive moment?
The answer seems to be 'yes, sometimes'. Using a high-end camera and restricting shutter speeds to 1/125th of a second or higher for moments slower than 0.1 seconds with placement tolerances of 10% or more then we can rely on the camera to implement the photographer's artistic judgement.
But there are a lot of constraints there. In practice the photographer will achieve greatest success if they use continuous shooting with caution. If the photographer takes the time to learn the behaviours of their subject, and to anticipate the decisive moment, the chance of success will be greater. The formula becomes:
(De - Ts)*Ns / ( (Ns/fps) - De )
And the chance of success shooting with a 1/30th of a second shutter speed at 6fps rises from 37% to 45%, almost 1 in 2 as opposed to 1 in 3.
The success will be all the more fulfilling since it relies less upon good fortune. The capabilities of the technology can certainly play a supporting role, especially with high-speed or uncertain action, but with today's technology intuition remains firmly the province of the seeing eye.
Summary
Contrary to dogma I consider all photographs of worth to contain a 'decisive moment', otherwise they are snapshots or documents.
Depending on the subject the moment can have a wide range of durations. When dealing with action, the moment's duration is a function of the size of the moving object and its speed. If the action is orthogonal to the plane of the image the moment's duration is a function of the change in apparent size of the moving object. If the action doesn't move (e.g. is a change in expression) then knowledge of the subject is required to understand the duration of the decisive moment. For example, expression related to speech may be a function of the speed of the speech.
The decisive moment in action shots may well be around 0.1 seconds on average, although panning may be required. Moments of this duration cannot be reliably captured by a camera's high-speed continuous shooting mode in a wide range of situations. High-speed shooting can be a help, but only if the photographer approaches the shot with the anticipation needed to 'intuit' the moment.
This reliance on human skill transfigures the mechanical craft of photography to an artistic endeavour. Despite advances in technology, photography remains an art.


